Getting Started with Solr & Carrot2 Clustering
Every time I start a new Solr project I have to remind myself with the basics again, such as setting up & configuring Solr Cores, updating indexes and plugging in projects such as Carrot2’s classification engine, so I decided to create this post as a reminder of the how to perform the main operations you might encounter when playing around with a Solr engine.
Installing & Configuring Solr
There is really not much to installing Solr on Windows, I like to go for the BitNami Solr installer just because it comes packaged with Apache Server, usually up-to-date with the latest Solr version, and just makes the whole process much simpler.
To run Solr from command line, simply navigate to the start.jar file in the Solr directory (for example C:\BitNami\solr-4.3.1-1\apache-solr), and issue the command:
java -jar start.jar
Assuming that Java is installed and setup correctly, and the Apache Server that is associated with the Solr instance is running, you should see the start-up sequence for Solr. Here Solr will output any informational, warnings & error messages associated with starting and interacting with the Solr instance, such as querying or updating indexes; this is a great place to start diagnosing and debugging any errors you are experiencing with the Solr instance, such as any issues reading the core’s Schema or Configuration files, alternatively the Solr interface also provides a logging mechanism for any errors during startup and operations, under the Logging menu.
A note on installing BitNami: I found that the BitNami installer fails to configure the library directories in the solrconfig.xml file for the default collection (usually called Collection1), Solr will still run fine, although the error will be reported to the default output console (if you are running Solr manually through a command line) when the engine is starting up, the issue will actually manifest when trying to use any of those libraries being referenced, such as the clustering libraries, otherwise it will go undetected.
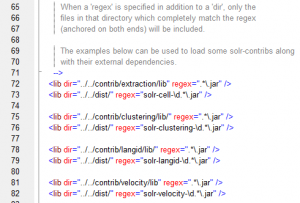
To resolve this issue, search for all occurrences of the file solrconfig.xml file in your Solr directory, and ensure that the <lib /> tags are correctly setup and pointing to the right directory, for example the clustering library in my installation is located at:
<lib dir="../../contrib/clustering/lib/" regex=".*\.jar" />
rather than the default installation value of:
<lib dir="../contrib/clustering/lib/" regex=".*\.jar" />
To create a new Solr Core all you need to do is to take a copy of the default Solr Core directory (usually called collection1), rename it to whatever you would like to call your Core, and then using the local Solr interface under the Core Admin menu, add this new Core referencing the newly created directory. You can now edit the Schema and SolrConfig XML files locally to that core. The XML configuration file for all Solr Cores is called solr.xml and can be found at the root directory of the Solr instance.
Updating Solr Collection Index via cURL
There are numerous ways you could insert/update/delete your Solr indexes, all involve making a call to the Solr web service with the correct request handler (whether it is CSV, XML, JSON, DOC or even your own custom handler).
For testing Solr, or in an R&D (non-production) environment, I like to use cURL to maintain indexes on my Solr instance, cURL will allow you to issue HTTP(s) requests to your Solr (or any) web service, as well as POST data to that end point, among many other cool features.
I found the easiest request handler to deal with is the XML one, which, by default, takes the following XML structure for inserting data into a particular Solr index
<add overwrite="true" commitWithin="10000">

<doc>

<field name="id">0</field>

<field name="some-other-field">abcdefg</field>

</doc>

</add>
Where field names are based on the configured Solr schema.xml file for that particular collection.
Now in order to upload a file to Solr’s XML request handler, all you need to do is issue the following command line with cURL’s executable:
cURL "http://localhost:8081/solr/documents/update?commit=true" --data-binary @file_name.xml -H "Content-type: text/xml"
Replacing localhost:8081 with your own configured Solr instance address, /document/ in the URL with your own Solr Core collection, and file_name.xml with the relevant file name.
I found that dealing with CSV uploads to Solr can be a tiny bit tricky, I strongly recommend reading the Updating a Solr Index with CSV guide.
Deleting Solr Collection Index via REST
You can delete data in a Solr index either through your browser, or again using cURL to issue a web request.
The HTTP command to delete all data from a particular Solr instance looks like this:
Replacing localhost:8081 with your own configured Solr instance address, /document/ in the URL with your own Solr Core collection
The command for deleting particular IDs (or based on any field) from a Solr index is just a derivative of the above URL, replacing *:* with the relevant field and value pair. So to delete an entry with id 0, all you need to do is:
Running & Querying Carrot2 Clustering Engine on Solr
Carrot2 is a very powerful clustering engine, which is used to group documents together under certain “themes”, combining Carrot2 with an Information Retrieval system such as Solr produces very interesting results, and really does aid the user experience when drilling through and slicing and dicing the search results.
In order to start the Solr instance with clustering enabled, you need to run the start.jar file with the following flags:
java -Dsolr.clustering.enabled=true -jar start.jar
This will load the Carrot2 clustering module, you will need to pay attention to the loading sequence to see if there are any issues experienced while running the Carrot2 package.
Querying Carrto2 is pretty simple, instead of issuing a clustering query instead of the normal select query, the URL for such a query might look like this:
Again, replacing localhost:8081 with your own configured Solr instance address, /document/ in the URL with your own Solr Core collection.
This will allow you to create your own query, with the specific search string, for retrieving the data, but then also append the clustering results to the returned XML file.
Solr Resources & Projects
There are loads of Solr resources out there, here are a few that I found particularly helpful.
- Solr schema FieldType definition functions, including Analyzers, Tokenizers and Filters: A must read before editing any schema.xml file.
- Configuring and managing Solr Cores: Also helpful if you end up breaking Solr by deleting all Cores, which I’ve done on multiple occasions.
- Slides on building a recommendation engine with Solr: Really helpful guide, and shows what is really possible with Solr in terms of building a real-time recommendation engine.
- Solr Searchbox Tagger: Haven’t really tried this 3rd party solution for keyword extraction (opted in for a home-brew solution instead), but looks promising.
- Solr can learn and go big!, Integrating Apache Mahout with Solr: An interesting approach combining Mahout’s awesome machine learning capabilities with Solr.
- OpenNLP project integration with Solr: At the time of writing this, the project is still in the trunk (not an official release), and its a nightmare trying to set it up, but the results are fun, particularly for Entity-Recognition.
- Solr Client Libraries, UIs and Applications: Really helpful resource to get started quickly with Solr.
- Solr’s advance libraries and tools: Shows all recent Solr integration and extension projects, including Carrot2, OpenNLP, UIMA, etc.
- Solr UIMA: Another language processing library, which integrates with external APIs such as Alchemy
That’s all folks, hope you found this guide to be helpful in getting started with Solr.


Leave a Reply
Want to join the discussion?Feel free to contribute!